Wavebox Teams: Create an Install Template for your Team
Get your team set up in Wavebox fast with a ready-made template. Templates include all the apps and tabs your team needs to hit the ground running.
You can create a template from your own setup or build one from scratch. Follow the steps below to get started.
🧩 What’s an Install Template?
A Template is a starting point for team members. It can include:
- Spaces, apps, groups, and tabs
- Saved passwords (optional)
- All features are enabled e.g. Connect, Smart Notes, Profiles etc.
🔒 Note: Once installed using a team template, users can use all features and make changes. For locked-down, remotely managed setups, see Wavebox Live.
Walkthough Video
Step-by-Step Guide
STEP 1. Start a New Profile

Best Practice! Creating your template in a new, separate profile keeps your personal setup safe.
- In your Wavebox, click the Profile Avatar (top-right corner)
- Select Add
- Name it something like
Sales Template - Choose Use current subscription
- A blank new profile will open.
STEP 2. Create a Template using your Profile
👍 Skip this step if you are starting from scratch.
If you want to base the template on your own Wavebox setup:
- In your own profile, click Profile Avatar → Share Icon (top right)
- Launch the Template Wizard
- Follow the steps and create a Master Password (if including passwords)
- ⚠️ Never include your own personal logins
- Copy the final Share Code to your clipboard
- 🎯 You can also find this code later under My Wavebox → Templates.
STEP 3. Import your Template
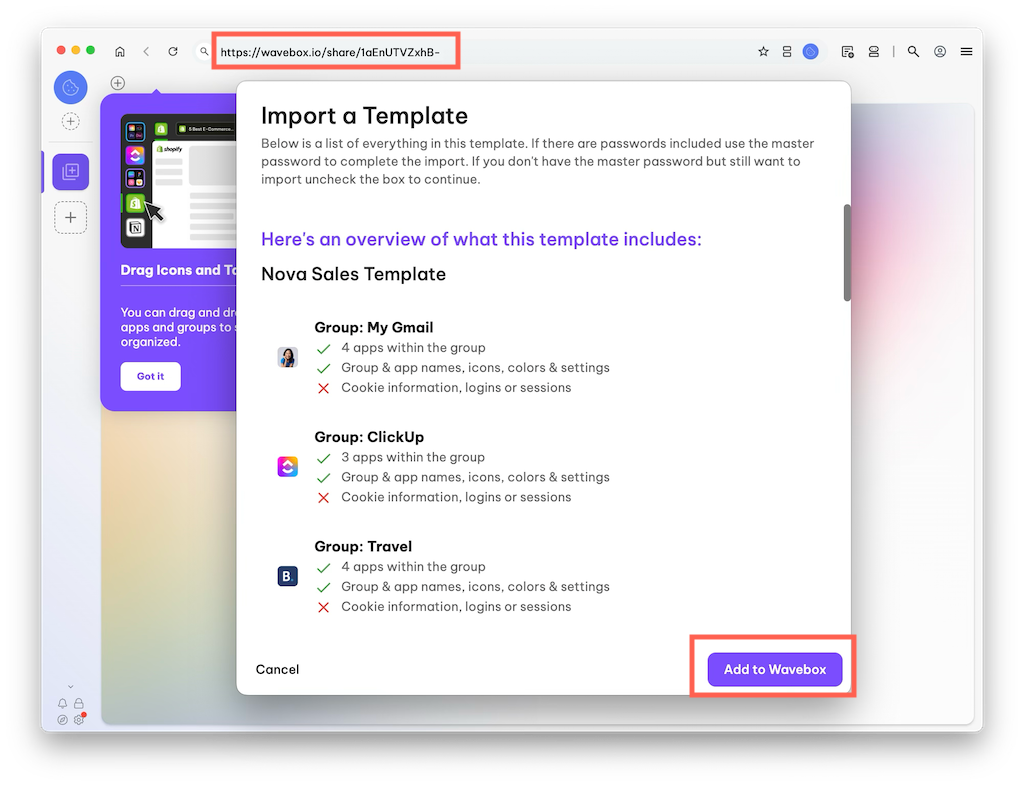
Navigate back to the new (blank) profile:
- Paste the share code into the address bar and hit Enter
- Follow the wizard steps
- Enter the Master Password if prompted.
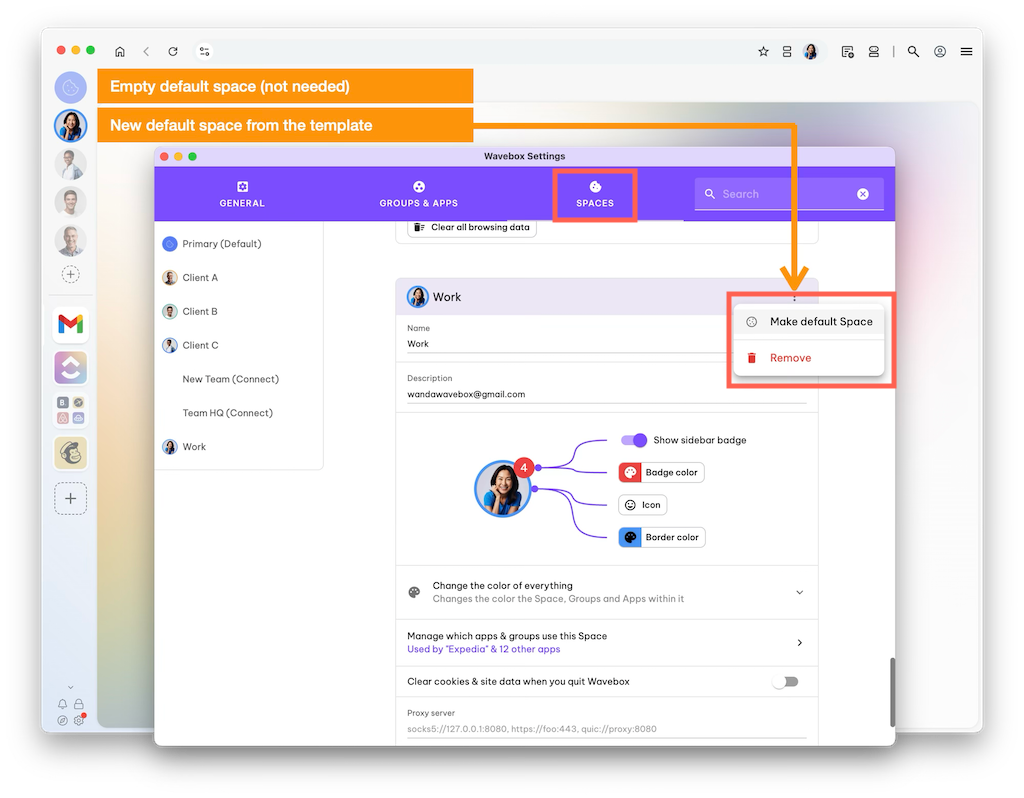
Set your default space:
- Go to Settings → Spaces
- Find the desired Space > Kebab menu (⋮) > Set as Default Space
- Remove the original blank space (type
DELETEto confirm)
STEP 4. Customize the Profile
Now build the setup your team will use.
✉️ Add the Users Login Email
- The first group/app should be the users login email.
- If your organization uses Google or Microsoft login, you should add that webmail app first—if you used your work profile as a template, this will probably be setup already.
- The user should use this email to login to Wavebox.
▶️ Add & Organize Content
- Add Spaces, Groups, Apps, and Tabs
- Remove anything personal or private
- Use clear, consistent naming (e.g.
Marketing,Client A Email,CRM)
🔐 Add/Check Passwords
- Sign-in to each app to add account credentials, or to check that the correct details are in the Password Manager.
- If you are using a Chrome extension for passwords, you can share a link to it via the shared Dashboard.
- ⚠️ Never include your own personal logins in a profile that will be shared.
🎨 Apply Company Branding
- For example, add your company logo to the default Space icon, or the first group icon.
- Add a company branded background to a shared dashboard.
📌 Share a Dashboard
- Dashboards are a great way to share web resources with your team
- Dashboards can replace extensions like Workona.
- Click + in the webdock or tabstrip and add a Dashboard app from the store
- Learn more about creating and sharing a team dashboard.
STEP 5. Generate the Template & Code
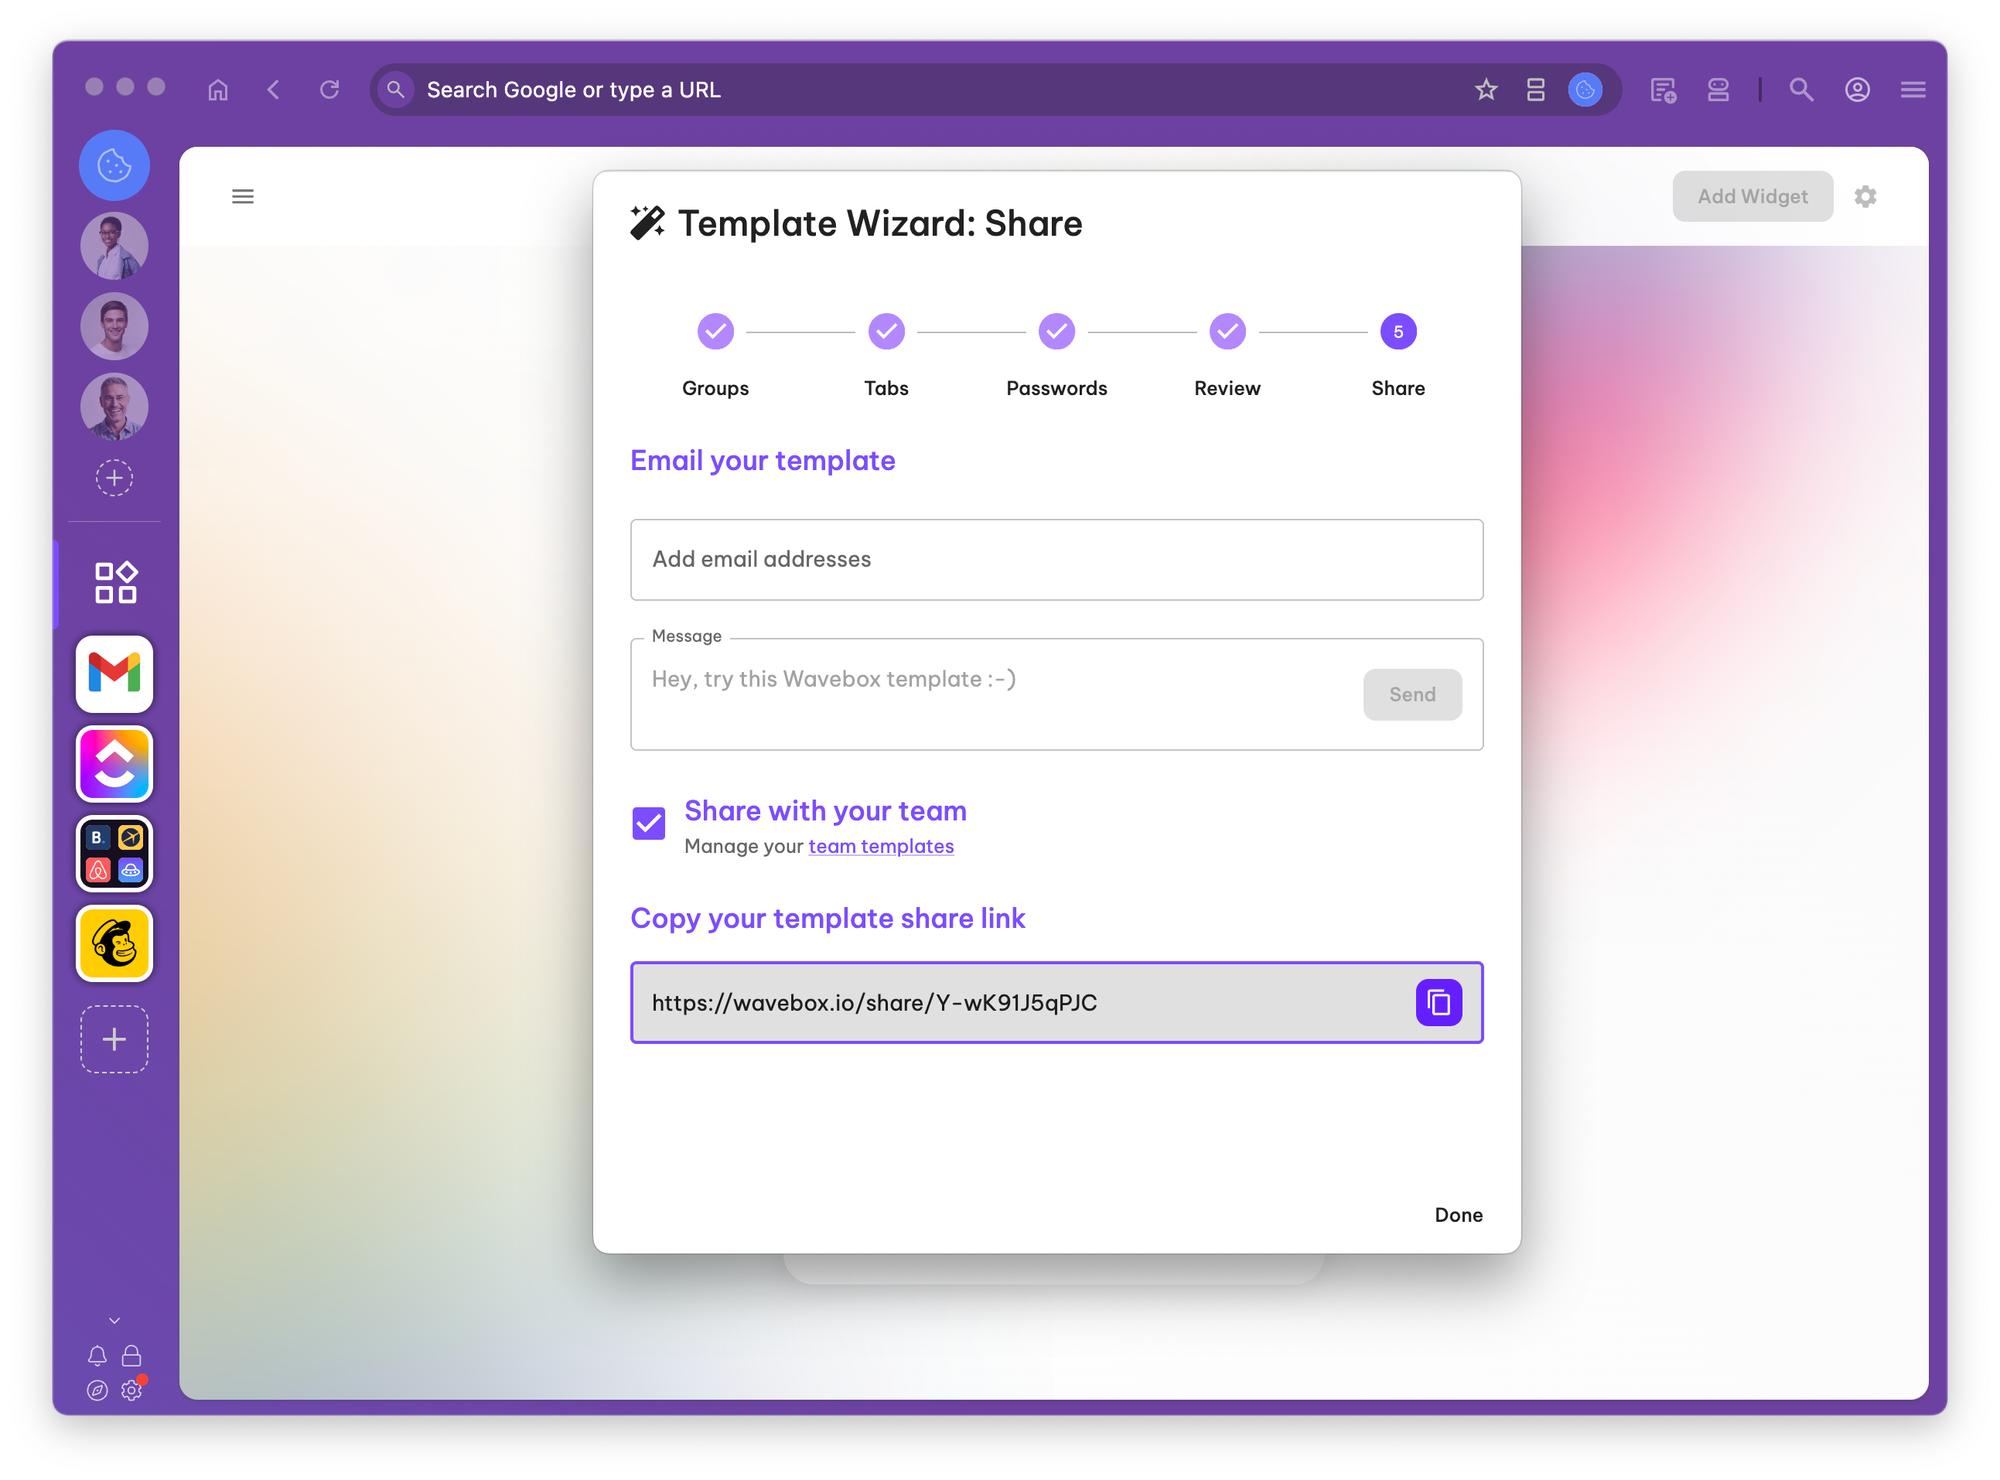
- In your newly customized profile, click the Profile Avatar → Share Icon
- Run the Template Wizard one last time
- Create or enter a Master Password if needed
- At the last step:
- ✅ Check the box for Share with Team
- 📬 Email yourself a copy of the code (optional)
- 💾 Copy the Share Code to your clipboard.
🎯 You can also find this code later under My Wavebox → Organization → Templates.
💬 Remember: Templates are editable by default. If you make updates to the template after sharing the code, you must generate a new code to include your changes. For enforced layouts you can manage remotely, check out Wavebox Live.
🎉 You're Done!
You can now assign the template to users, and/or share the code.


